DIY: Roberto Cavalli inspired coat, details
This DIY I made a year ago, I decided to split this post into two parts, in this one I will show you how I made this coat transformation and decore and the next post will show photos of it - after it is done and ready to wear.
Fo this project you will need:
1. light biege or cream colored trench coat , the fabric for my coat is maleskin, suede like, but it can be a regular classic style trench coat:


For my belt I used two belts:
I had old belt, in slightly lighter color than my coat , suede like fabric, but a little bit wider.
And the belt from the coat, I used just half of it.
I glued the belt from my coat to the wider belt , making sure the belt from the coat,( that goes on top) is longer from the end where it will go through the buckle. I put it thorugh the buckle and glued it on the back:
Пояс я переделала, у меня был замшевый бежевый - довольно широкий пояс, я на него приклеела пояс от пальто, пришив на него такую же золотую тесьму. Пряжку я нашла на своем любимом сайте www.etsy.com , и все это закрепила (бряжку и получившийся пояс)

The other half of the belt (from the coat) was used to cover the back of the belt that I made, since it was also decorated with the gold cord , and I had to cover all the imperfections with this second part of the original belt.


Fo this project you will need:
1. light biege or cream colored trench coat , the fabric for my coat is maleskin, suede like, but it can be a regular classic style trench coat:
2. Golden threads those used in needle point or cross stitch, golden cord for embroidery, glue, tooth pick, needle and decorative buttons:
Для этого проекта вам понадобится:
золотая тесьма, клей, нитки, игла.

3. Wooden embroidery hoop. the widest you can get, I found the one with in size of 18x18 inches:
Пяльца:

4. And the paper template of the actual applique, one for upper part, and another for the lower part.
I drew two templates for my applique close to the one on the original coat from Roberto Cavalli collection and printed them out:
Надо рисовать образец рисунка,
 |
| upper part applique верхняя часть аппликации |
 |
| Lower part applique нижнняя часть аппликации |
First I cut the collar from the coat and sewed the golden cord on top:
Первым делом я избавилась от воротника, на получившийся круглый ворот я пришила золотую тесьму


Then I cut out the fabric decor, leaving only the very first (top) seam:
Также отрезала небольшую декоративную часть спереди (показано стрелками)- оставив немного со швом, на нее и будет накладываться верхняя часть аппликации.


I printed images of the applique and cut through the drawing, so I had two trafaret templates, it looks like this, I took this photo in front of the computer screen, so the light goes through, it is easier to see how it looks like:
This template is for upper part of the coat. Put the coat on the solid surface (table), put the trafaret on the top of the left side of the coat , secure the paper with something heavy from each side and draw the decor through the trafaret with pencil:
Рисунок я вырезала что бы он получился сквозным, как трафарет, перевелa трафарет на ткань карандашом.

When one (left) side is drawn, remove the paper trafaret, turn over and do the same on the opposite, right side. The drawing will look something like this (the photo below, is just an example, the actual drawing was done, a year ago, and I didn't take the picture of it):

When the right side is done, put the coat through the wooden embroidery hoop, secure it, so it is set tight, but don't overstretch the fabric, and start applying the glue to the drawing with the tooth pick, immediately after that glue in the golden cord, do it one by one (so the glue doesn't dry):

Затем наклеила по нанесенному рисунку аккуратно золотую тесьму на пальто.
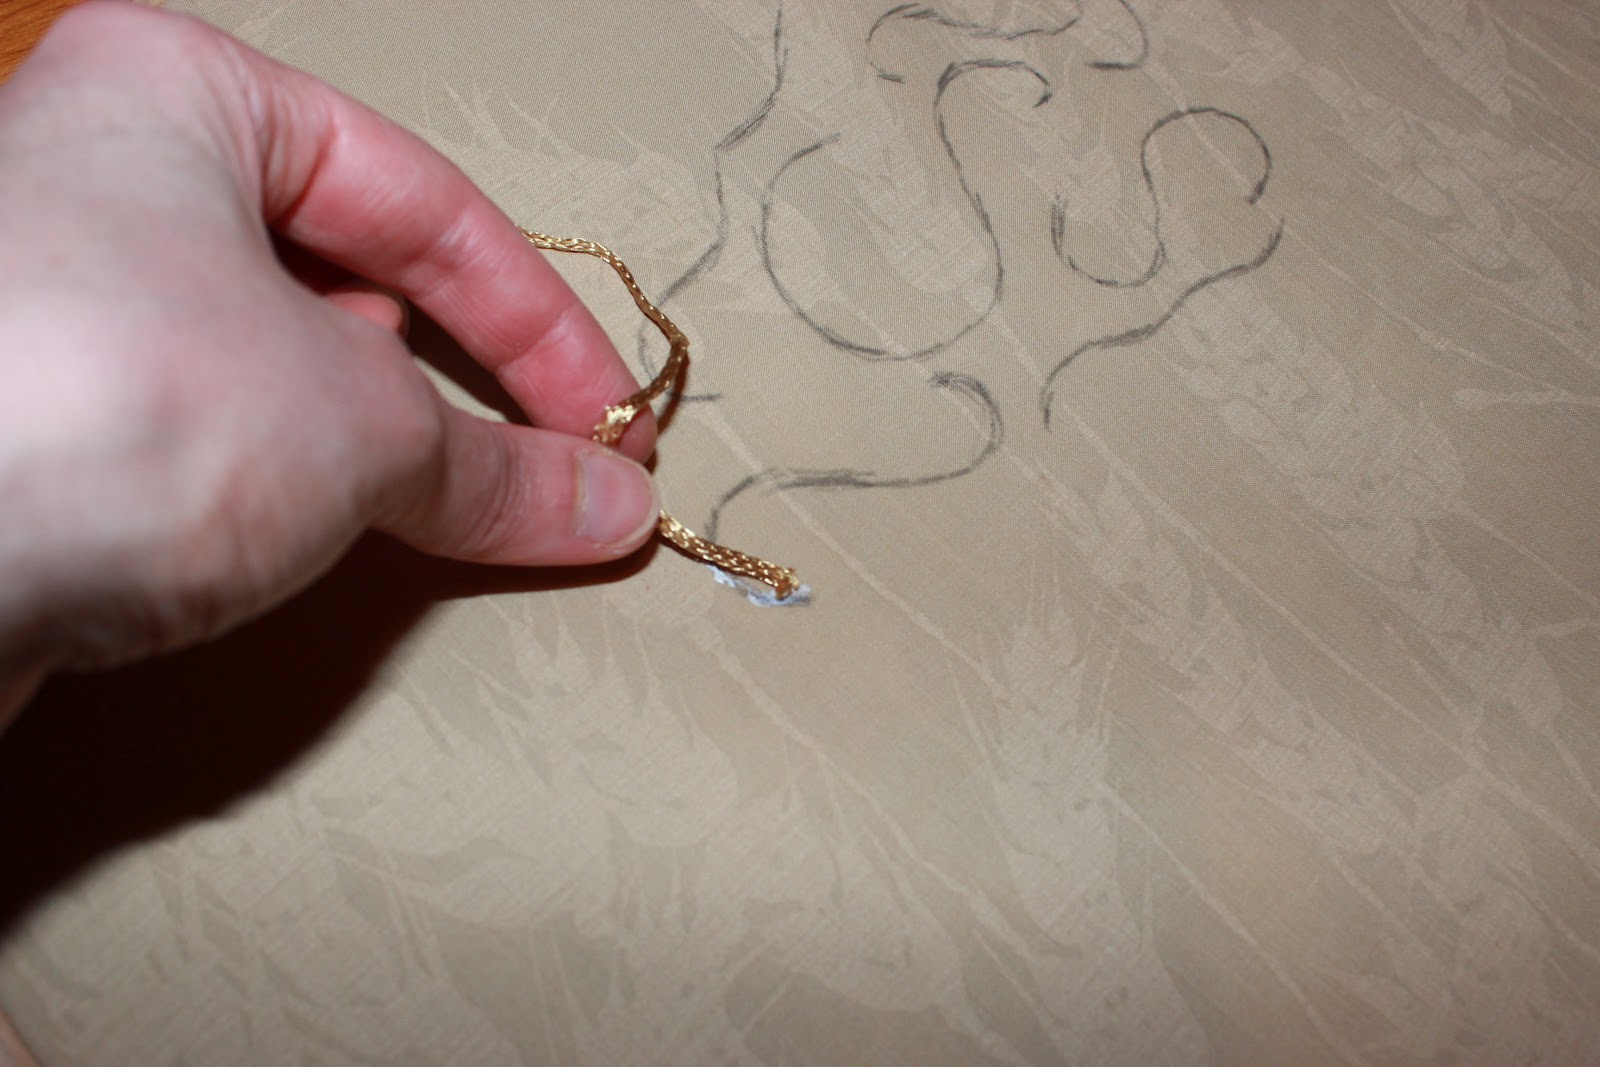

When one side is done, you have to take gold thread and start sewing over each glued cord, making few needle point stitches from both ends of each cord, it will look like this:
Когда вся тесьма приклеена, обшила ее довольно густо золотой нитью.

Do the opposite side in the same way .

When both are finished, draw the trafaret (the second wider template) on the lower parts of the coat and also make the applique and then sew it on to the coat exactly in the same manner the upper parts were done. It will look like this:
Тоже самое проделала в нижней части пальто.

When those are done, the next part was make the belt. I ordered a beautiful buckle from www.etsy.com:

For my belt I used two belts:
I had old belt, in slightly lighter color than my coat , suede like fabric, but a little bit wider.
And the belt from the coat, I used just half of it.
I glued the belt from my coat to the wider belt , making sure the belt from the coat,( that goes on top) is longer from the end where it will go through the buckle. I put it thorugh the buckle and glued it on the back:
Пояс я переделала, у меня был замшевый бежевый - довольно широкий пояс, я на него приклеела пояс от пальто, пришив на него такую же золотую тесьму. Пряжку я нашла на своем любимом сайте www.etsy.com , и все это закрепила (бряжку и получившийся пояс)

The other half of the belt (from the coat) was used to cover the back of the belt that I made, since it was also decorated with the gold cord , and I had to cover all the imperfections with this second part of the original belt.

One it was done, I made a hole for the buckle closure and also decorated it with the stitch


The last part was to change the closure on the coat, I removed buttons, and folded in half
each site of the closure (SEE THE PHOTO BELOW), securing it with the stitch:

Застежку я тоже переделала, загнула (обе стороны), прошила их - чтобы держались.

Then I made holes on each side at equal distance, and saw the golden cord through each hole:
и сделала по бокам отверстия (с помощью шила) и протянула такую же золотую тесьму через эти отверстия.

Then, I sewed hooks on the inside:
Затем внутри пришила крючки - на которые пальто застегивается.

The final part was to sew the decorative buttons at the top and apply the same gold cord to each sleeve:
В финале я пришила декоративные бусинки на верхныю часть пальто.

А также пришила декоративную тесьму по краю рукавов.

To finalise:
This is BEFORE:
And AFTER:
It just takes a little bit of patience and few hours each day to make it, but at the end you have nice looking coat.
Thnak you very much for visiting my blog!
Talk to you later
love it!!! well thought, and well done! xox, d.
ReplyDeleteoh my god ,
ReplyDeletethat's incredible job my lady
you should be a fashion designer & i assure you that you will make it to top .
keep your great work going ,,
love your creativity ,
It's really incredible job!Gorgeous DIY!Well,done! Faina.
ReplyDeleteOчень трудоемкая творческая работа.Выполнена безукоризненно!
ReplyDeleteМила.
Мастер - ЗОЛОТЫЕ РУКИ!
ReplyDeleteОлечка, и как долго ты вышивала всю эту красоту?
ReplyDeleteАлла Г.
Аллочка, вообщем все: аппликация,пояс, ну и все остальные трансформации с пальто заняли 2 месяца.
DeleteЭто действительно произведение искусства.Сейчас мало кто занимается вышивкой.Класс!!!
ReplyDeletethis jacket is really beautiful........I love what you've done here. Exquisite!
ReplyDeleteХорошая задумка и прекрасный результат.Спасибо тебе за твои мастер классы,возможно, кто обладает таким же терпение как ты задумается а стоит ли выбрасывать вышедшие из моды вещи.
ReplyDeleteОльга,я под впечатлением .У тебя огромная фантазия!Молодец!
ReplyDelete